

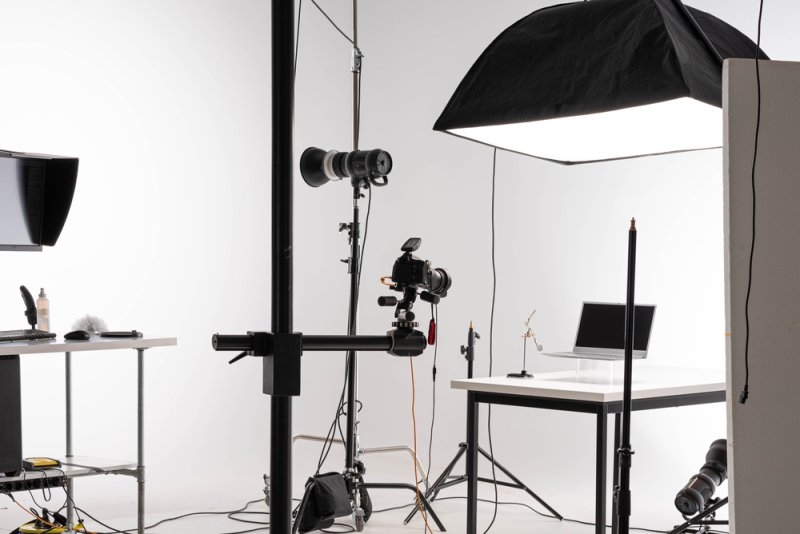
Picture this. You've spent a year building a product, and your launch page goes live with three dim photos taken on a desk. Ouch.
That's the gap product launch photography fills. Done well, it makes people stop, look, and actually care before they've read a single word about what you're selling.
Here's how to plan it, shoot it, and squeeze every bit of value out of the images afterward. There are a few tables too, because nobody wants to dig through walls of text.
It's the collection of photos you make to introduce a new product. Think studio shots, real-life scenes, sneak peeks from the set, and pictures from any launch event you host. Each photo has one job: help someone understand the product fast and want it.
Shoppers can't pick your product up. They can't feel the weight or check the stitching. So their eyes do all the work, and product photography becomes your only sales pitch in that first second. Great images earn trust quickly. Muddy ones make a solid product look risky.
Start from the launch date and count backward. Every task needs an owner, a budget, and a deadline; otherwise, things slip. Skip this step, and you'll be booking a studio the week before release, which gets expensive and stressful.
Ask what you actually want from this launch. Pre-orders? Press coverage? A busy social feed on day one? The answer decides how many photos you need, what formats matter, and when each file has to land on your desk. Write it down before you book anyone.
| Timeline | Key Task |
| 6 weeks out | Set goals, budget, and creative brief |
| 4 weeks out | Book photographer, studio, and models |
| 2 weeks out | Finalize product samples and props. |
| 1 week out | Confirm the shot list and delivery formats. |
| Shoot day | Capture, review, and back up files. |
A shot list is just a checklist of every picture you want. Hero image: close-up of the texture, someone using the product, the box. Add rough sketches or reference photos if you can, so the photographer isn't guessing. It takes an hour and saves a full day of confusion.
Cameras are merciless. They'll pick up a fingerprint, a scratch, or a loose thread that you'd never notice in person. So clean and inspect every sample, and bring a spare in case something gets damaged mid-shoot. Run through this list the night before.
You need a mix, because each type of photo answers a different question in a buyer's head. Some show what the product looks like, others show how it feels to own it. This table breaks down the five core types and where each one earns its keep.
| Image Type | Purpose | Best Use |
| Hero shot | Show the product clearly. | Website, ads, press kits |
| Lifestyle shot | Show real-life use. | Social media, email |
| Detail close-up | Highlight features and quality | Product pages, catalogs |
| Packaging shot | Build unboxing excitement. | Social posts, marketplaces |
| Scale or group shot | Show size and variety | Store listings, brochures |
Try to grab all five in one session. It's cheaper, and your brand look stays consistent.
Honestly, the best photography for a product launch is a blend. Clean studio shots prove the quality. Lifestyle scenes show real people using the thing in real life. You want both, so give each its own time slot on shoot day instead of squeezing lifestyle in at the end.
Studio images use controlled light and plain backdrops, so color, shape, and texture come through accurately. Shiny surfaces are tricky, though. A few photography reflector tips go a long way toward softening harsh shadows and taming glare. Small lighting fixes like that make a product look pricier without any heavy editing afterward.
Lifestyle photos drop your product into a believable moment. A coffee grinder on a busy kitchen counter, say, or a backpack on a rainy commute. Shoppers start imagining it in their own lives, and that's often what tips them toward buying. Pick models, places, and props that feel like your customer's world, not a magazine set.
Usually, yes. Professional product photography brings proper lighting, accurate color, real editing skills, and the experience to fix problems fast while everyone's standing around waiting. For a main launch campaign, that matters. For quick social clips, maybe not. Here's how the two routes compare side by side.
| Factor | DIY Photos | Professional Photographer |
| Upfront cost | Low | Higher |
| Image quality | Varies widely | Consistent and polished |
| Editing time | Heavy on your team | Handled by the expert |
| Brand impact | Risky for big launches | Strong and trustworthy |
| Best for | Small tests and drafts | Main launch campaigns |
A product launch photoshoot goes best when everyone knows the schedule, the priorities, and who signs off on each image. Nothing kills momentum like waiting for an approval nobody's sure how to give. Keep things organized, and you'll leave room for the creative stuff without blowing the budget. Two habits help a lot.
Shoot the big, important images first, while everyone's fresh and the product still looks perfect. Check key frames on a larger screen as you go, because a photo that looks sharp on a small camera display can fall apart at full size. Catching that mid-shoot is far cheaper than reshooting next week.
People love a peek behind the curtain. Short clips and photos from the set make your audience feel like insiders, and teasers shared a few days before release can get conversations going early. Even prototype photos work, so don't wait for the perfect final version. Just have someone approve each teaser first, so nothing unfinished slips out.
Fresh ideas help your images stand out in feeds and inboxes that all look the same. Try the ones below, then bend them to fit your brand, your budget, and your audience. Most work in a proper studio, at a live event, or even on a phone.
Different products need different visual stories. A lipstick and a laptop don't want the same treatment. Use the table below as a starting point for popular categories, along with the one detail worth capturing in each. Then adjust freely, since your audience will shape what works.
| Product Type | Photo Idea | Key Detail |
| Fashion | Outfit styled in motion outdoors | Fabric texture |
| Tech gadgets | Desk setup with the product in use | Ports and screen |
| Food and drinks | Pour or bite action shot | Freshness and color |
| Beauty | Swatches on skin with open packaging | True shade |
| Home goods | Styled room scene | Scale and finish |
Social platforms reward pictures that stop the scroll, and most people see them on a phone. So design every frame small. Keep the product big, the background simple, and any text on the image short. A smartphone can handle quick behind-the-scenes clips too, especially if you follow these mobile photography tips for sharp, well-lit shots.
| Platform | Suggested Format |
| Instagram feed | 4:5 vertical |
| Stories and Reels | 9:16 vertical |
| LinkedIn and Facebook | Square or wide landscape |
| 2:3 vertical |
Strong product launch photography gives your release a clear voice and a longer shelf life. Plan early, prep the product, shoot a balanced mix, and size everything for each channel. Then start that shot list today. Your images will do a surprising amount of the selling.
It's the set of studio, lifestyle, and event photos made to introduce a new product. Brands use them across websites, ads, emails, press outreach, and social media during the weeks around release.
Most brands need roughly fifteen to thirty final images, covering hero shots, lifestyle scenes, close-ups, and packaging. Smaller launches can start with fewer, then add more once early customer feedback starts coming in.
Six to eight weeks before release is a safe window. Book your photographer early, since good ones fill up, and leave room for product samples, revisions, editing, and teaser content before the announcement.
Yes, for social clips, teasers, and behind-the-scenes content, a modern phone does the job nicely. For hero images, ads, and packaging, though, professional gear and lighting still give sharper detail and steadier color.
Drop them into blog posts, newsletters, sales decks, marketplace listings, and retargeting ads. Refresh the crops and captions now and then, so the same photos keep working hard long after release day.
This content was created by AI