

These days, your phone is actually a pretty serious camera. You don’t have to lug around a big DSLR to snap great shots. Honestly, some of the coolest photos on Instagram and travel blogs come straight from smartphones.
But let’s be real—nailing a great photo isn’t just about having fancy tech. It’s all about how you see things, how you line up your shot, and how you use the tools you already have. That’s where knowing a few mobile photography tricks can make a big difference.
In this guide, I’ll share practical ways to boost your photos with techniques that work, whether your phone’s an iPhone or Android. Doesn’t matter which—good photos are good photos.
If you feel like your pictures always come out a bit flat or are just inconsistent, you’re not the only one. Most folks just tap the screen, leave it in auto, and hope for magic. Sometimes it works, but you can do better. Your phone’s clever, but it needs you to tell it what to focus on.
Good composition is huge. Even if your camera’s just average, the way you frame things can totally transform a shot.
Try these:
None of these is a “magic formula.” They just help your viewer see what you want them to see. Start looking for them, and you’ll spot them everywhere.
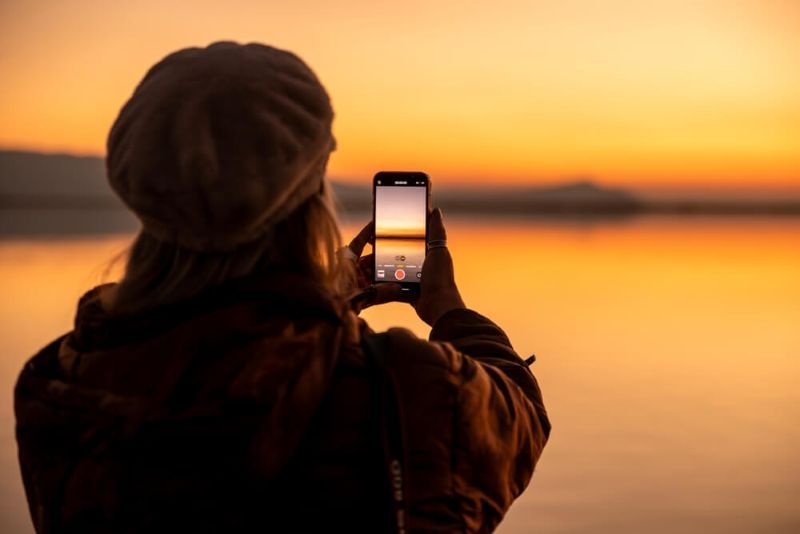
Lighting is everything. Seriously, it matters even more than which camera you’re holding. Shooting early in the morning or late in the afternoon (that “golden hour”) gives your photos a soft, warm vibe. The harsh midday sun? Not so flattering.
Indoors, grab any natural light you can—stand near a window. Natural light almost always beats artificial. And here’s a quick trick: tap your screen to tweak exposure before you snap a photo. You’ll get way more control than just letting the phone do its thing.
Once you get comfy with basic composition, don’t stop there! Phones have other cool features worth playing with.
Most people just tap their subject once and move on. But if the shot looks too bright or way too dark, you can fix it—just slide your finger up or down to adjust exposure. It’s a tiny move, but your photos pop when you get it right.
Capturing movement—kids, pets, traffic—is tricky. One snap often misses the moment. Hold down the shutter button for burst mode; it’ll fire off a bunch of photos in seconds. Pick the best later. Simple—and super useful.
Taking every shot at eye level gets boring fast. Crouch down or shoot from above, just try a new perspective. Honestly, even a small shift can change a photo’s mood.
If you’ve got an iPhone, you’re set with some powerful features—but using them right is key.
Portrait mode’s famous for that soft, blurry background look (bokeh). It shines when:
But sometimes, regular mode actually looks better. Test both and see what works.
Gridlines help with framing and the rule of thirds. Flick them on in your settings—they’re faint but super useful for lining things up.
HDR balances bright and dark spots in your photo. Use it for landscapes, tricky lighting, or scenes with sharp contrasts. But don’t overdo it; too much HDR makes things look weird.
Android phones come loaded with features—especially the big names. It can feel overwhelming, but you don’t need to use them all.
Pro (or Manual) mode lets you tweak things like ISO, shutter speed, white balance, and focus. Start simple, with ISO and shutter speed. Lower ISO = less grainy photos, fast shutter = great for motion.
Low light used to ruin phone photos, but not anymore. Night mode stacks exposures to brighten your shot—just hold the phone steady for a few seconds.
Snapping a good photo is just step one. Editing makes it better. Don’t worry, you don’t need complicated software.
Check out these apps:
Each has its own vibe—try a few and stick with the one that feels right.
Over-editing is tempting (hello, saturation slider), but it doesn’t help. Gentle tweaks to exposure, a touch of contrast, and subtle color fixes go a long way. If you can tell you edited it, ease up.
Soon enough, you’ll notice your photos leveling up. Now’s when you start thinking about your personal style.
The pros are consistent. Pick color tones, lighting, and subjects you love. When your photos share a “look,” people recognize them.
Snapping tons of photos is fine, but focus helps more.
Try setting little goals:
Focused practice boosts your skills—and honestly, it keeps things interesting.
Smartphone cameras are better than ever. You can pull off stunning photos with just the phone in your pocket. But the real magic comes from you—your eye, your choices, your creative tweaks.
If you use these tips, play around with lighting and composition, get comfortable with your phone’s features, and practice a little editing—your photos will stand out. Stay curious and keep experimenting.
Use good lighting and frame your shots well. Clean backgrounds and smart composition go a long way. Adjust exposure before shooting — that alone helps more than you’d think.
Tripods, clip-on lenses, and portable lights can enhance your photos. A tripod is especially useful for low-light shots, while external camera lenses can add creative flexibility.
Keep your hands steady and use both hands when possible. In low light, use night mode or rest your phone on a stable surface to reduce motion blur and improve overall image sharpness.
The default camera app is optimized for your device and works well for most situations. Third-party apps can offer more manual control, but they may require extra setup and learning.
This content was created by AI